
Guide: Giving Homeowners a Client Portal in HomeWatcher
Updated: October 13, 2026
Giving Homeowners a Client Portal in HomeWatcher
Email a PDF report, then chase the invoice, then field the "did you make it out this week?" text. The client portal replaces all of that with a single link you can hand to every homeowner. They log in to a clean, private dashboard that shows their property, every completed visit report with photos, any open issues, and their invoices, and they can pay an outstanding balance right there. It turns HomeWatcher from a reporting tool into a polished, client-facing experience, which is one of the easiest retention and professionalism wins you can offer.
There is no password to create or remember. The homeowner requests a one-time, secure login link by email, clicks it, and they are in. Everything they see is scoped strictly to their own records, so one client can never see another client's home, reports, or invoices.
How a homeowner logs in
- Send your client to the portal login page and have them enter the email address you have on file for them.
- They click Send login link. For security, the page shows the same friendly confirmation whether or not the email is recognized, so nobody can fish for which addresses are registered.
- They open the email titled "Your HomeWatchTools Client Portal Link" and click the link. It is valid for 15 minutes and works only once, then it drops them straight onto their dashboard.

What the dashboard shows
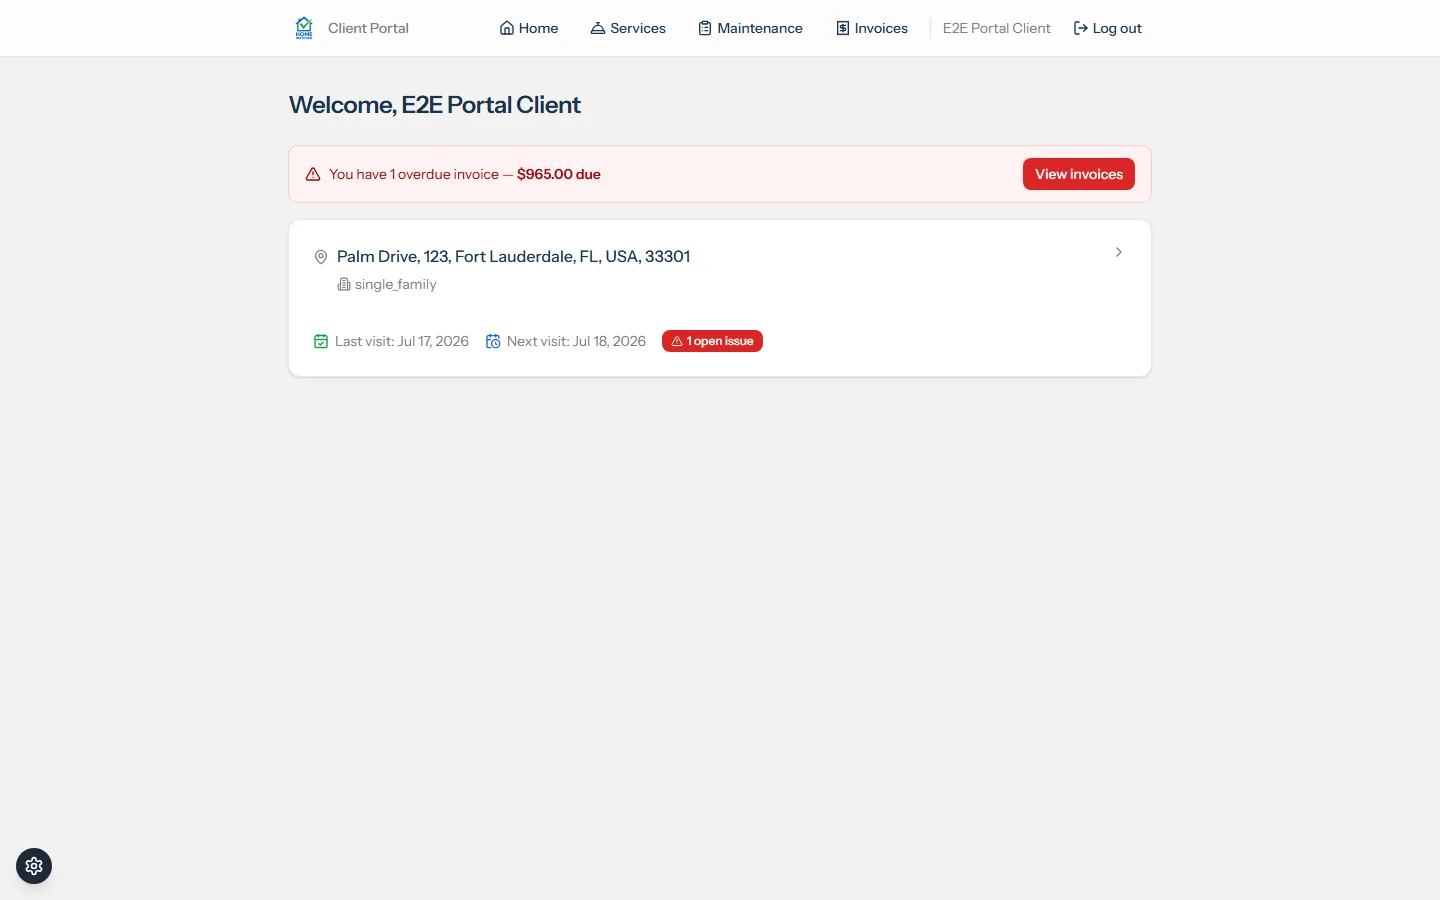
After logging in, the homeowner lands on a dashboard with a card for each of their active properties. Each card shows the address, the property type, the date of the last visit, the next scheduled visit, and a badge counting any open issues. If they owe money, a clear outstanding-balance banner appears at the top with a button to view their invoices.
Viewing a property and its reports
Clicking a property opens its detail view: a list of completed visits with dates and the technician's name, any open issues with their severity, and a summary of total visits and resolved versus open issues. Each open issue expands to show the photos and the technician's notes from every visit that saw it. Issues resolved in the last 30 days appear under Recently resolved, along with your note on what was done. Your private issue description is never shown. From any visit, the homeowner opens the full report, which includes your final notes, the checklist results, photos, the captured check-in time and location, and the signature. It is the same photo-backed proof of service you already create, presented to your client without you lifting a finger.

Reports in the Summary + Details layout open with a one-page summary: the overall status, what needs attention and a key photo, followed by the full checklist. Because the summary comes first, a homeowner checking on a phone sees how the house is doing before any checklist detail.
Paying an invoice online
From the Invoices link, the homeowner sees their sent, partial, overdue, and paid invoices. Opening one shows the line items, totals, and balance due. When you have online payments connected, a Pay now button hands off to a secure checkout so they can settle the balance in a couple of taps. If online payment is not set up, the invoice simply shows your contact details so they know how to reach you to pay.

Getting your clients in
There is nothing to switch on per client. Any homeowner whose email matches the one on their record can request a link, so the main thing on your end is keeping client emails accurate. Once they are, you simply point clients at the portal and let them self-serve.
The portal is read-and-pay only, which keeps it calm and predictable: clients can view their information and pay, but they cannot change your records. To see how it fits with the rest of your workflow, read our guide to managing clients and properties, explore the full features list, or get started and give your homeowners a portal of their own.
Written by
Mike
Mike is the founder of HomeWatchTools.com, dedicated to building simple, powerful software for the home watch industry.
Keep Reading
AI Home Watch Report Summaries Clients Actually Read
October 13, 2026
What goes on a one-page home watch report summary, how AI drafts it from your notes, what the AI never decides, and what homeowners see in the PDF, portal and texted link.
Don't Give Up: How Long It Really Takes to Get a Home Watch Business Off the Ground
October 13, 2026
Quiet early months are normal in home watch, and an uncertain economy can make them feel longer. A realistic first-year timeline, why the hard months pay off, and how to tell you're on track before your first client.
AI Report Summaries and Report Layouts
October 13, 2026
Put a one-page executive summary at the front of every report. Choose a layout, read and edit the AI-drafted summary, and pick the photos your clients see first.